Cocoa offers a nice visual editor for editing NSPredicate objects templates, called NSPredicateEditor. The NSPredicateEditor can be set up using code or in Interface Builder, which is preferable for simple use. The setup is fairly easy once you know how to do it. In this tutorial, we’ll be building a simple predicate editor example which shows the basic functionality of the predicate editor.
Setting up the AppDelegate 
Begin by creating a new Xcode project (⌘⇧N). Name your project wisely and create a new class in the Classes group, called AppDelegate.
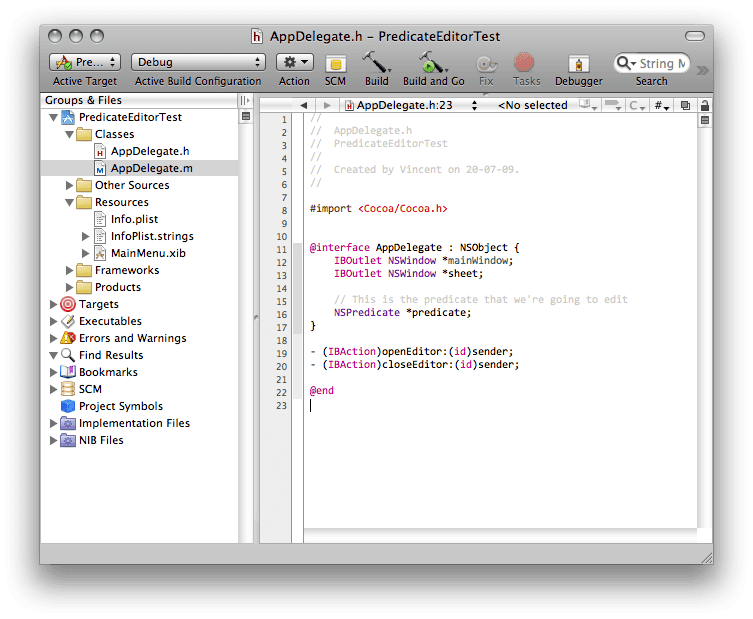
Switch to the header file and declare two IBOutlets for the main window and the
sheet on which we’re going to display the editor in a few minutes. Also, add
two IBActions called -openEditor: and -closeEditor:. Finally, add an ivar
that holds the NSPredicate we’re going to be editing.
Next, we’re going to fire up Interface Builder to build the UI. Double click on the MainMenu.xib file under the Resources group.
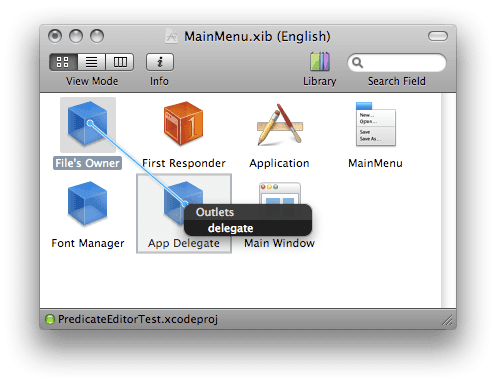
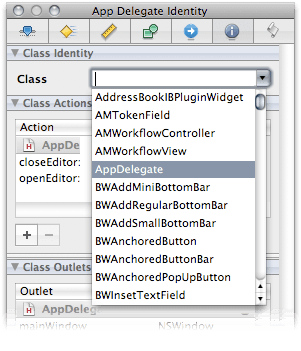
Drag an NSObject object from the Library into the XIB and call it App Delegate. Hit ⌘6 and make it a subclass of the AppDelegate class we just created. Then, hook it up to the delegate property of the File’s Owner.
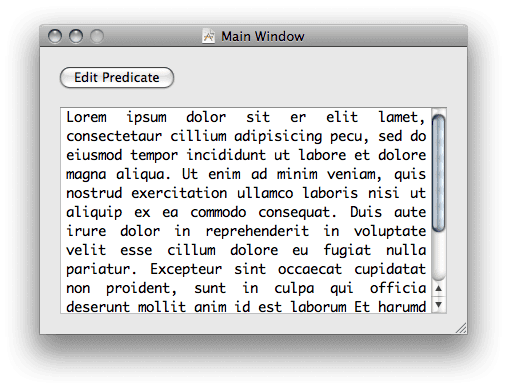
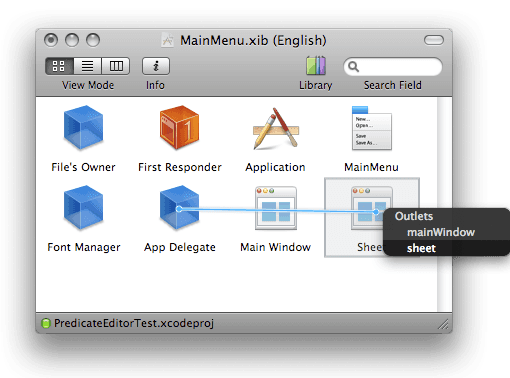
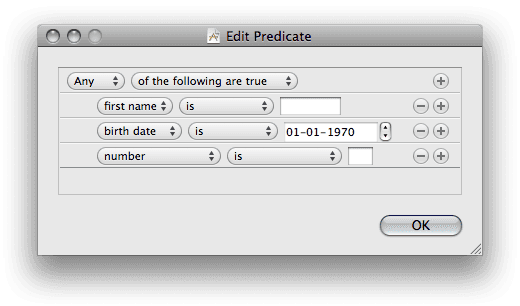
Drag a new NSWindow to the XIB-file and call it Sheet. Make sure the checkbox “Visible At Launch” is deselected or the sheet will not display properly at runtime. Open the main window and add a NSButton and a NSTextView to it. To the sheet window, drag a NSPredicateEditor and a NSButton. They should look somewhat like this now:
Now, we can hook up the outlets and actions as usual. Hook up the Edit
Predicate button on the main window to -openEditor: and the OK button on the
sheet window to closeEditor:. Then hook up the mainWindow and sheet outlets of
the AppDelegate class to the respective NSWindow objects.
Configure the NSPredicateEditor 
Once we have all of the connections between Xcode and Interface Builder set up, we can continue to configure the predicate editor itself, which is actually what this tutorial is all about. An NSPredicateEditor control uses a list of NSPredicateEditorRowTemplate objects that can handle individual (simple) NSPredicate objects. Combining these row templates enables the NSPredicateEditor to edit compound predicates. There is no limitation to the depth of nested compound predicates, although nesting too deep would not be advisable from a usability perspective.
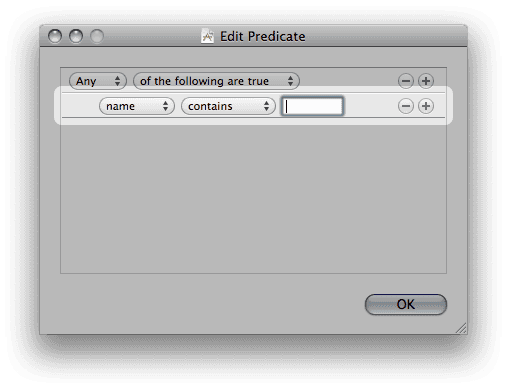
In the edit window, click a few times until the “name contains” row template is selected. In this row template, you define which key paths are supported. Supported here means two things:
- matching—given an existing predicate with this key path in it on the left-hand side, this row template can be used to alter the predicate;
- generation—when using the editor to create new predicates, adding a new rule for this key path will generate a predicate for this key path.
Gotcha 
A small gotcha, at least one that initially put me on the wrong foot, is that there is quite a difference between the rows that you see design-time in Interface Builder and the rows that are available run-time. At design-time, you define the NSPredicateEditorRowTemplate objects while at run-time you see instances of them. Hence, the number of rows at design-time is the number of different row templates available. At run-time, however, the number of rows is the number of predicates within the compound predicate (which each has an associated row template instance that handles it). Subtle difference.
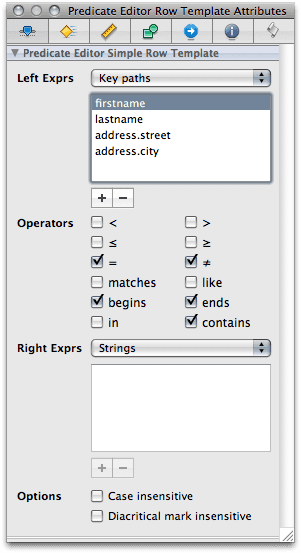
In short, in Interface Builder, create a row template for each type of match that you want to allow. Typically, this means for each data type that you want to support. In our example, we have the following setup:
- Row template #1 is for all string matches. Here, we have defined it for the key paths “firstname”, “lastname”, “address.street” and “address.city”. They, per definition, have the same allowed operators. If we want to have an other set of operators for a specific key path, we need to define a separate row template for it.
- Row template #2 is for date matches, i.e. our “birthdate” key path.
- Row template #3 is for all integer matches, i.e. our “address.number” key path.
The result looks like this:
Using bindings to connect the predicate to the UI 
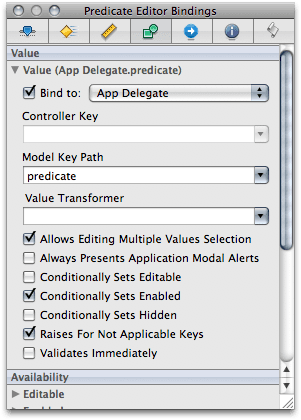
Next up, we simply connect both the text view from the main window and the predicate editor from the sheet window to the predicate key path using Cocoa bindings. In order to do so, select the NSPredicateEditor (first click the control to select the scroll view, then click again to select the inner NSPredicateEditor), hit ⌘4. Then, unfold the “Value” binding and hook it up to the App Delegate’s “predicate” key path.
Do the same for the text view in the main window, but this time hook it up to the “predicate.description” key path (since only strings can be displayed in a text view). When you do this, make sure that the text view is read-only, since the description property of objects should never be set.
Writing the code to wrap it all up 
Finally, we have only a bit of code to write in our AppDelegate implementation, so let’s go:
//
//  AppDelegate.m
//  PredicateEditorTest
//
//  Created by Vincent on 20-07-09.
//

#import "AppDelegate.h"

#define DEFAULT_PREDICATE @"(firstname = 'John' AND lastname = 'Doe') "
                    @"OR birthdate > CAST('01/01/1985', 'NSDate') "
                    @"OR address.city = 'Chicago' "
                    @"AND address.street != 'Main Street' "
                    @"OR address.number > 1000"

@implementation AppDelegate

- (id)init
{
   self = [super init];
   if (self != nil) {
      predicate = [[NSPredicate predicateWithFormat:DEFAULT_PREDICATE] retain];
   }
   return self;
}

- (void)dealloc
{
   [predicate release];
   [super dealloc];
}

- (IBAction)openEditor:(id)sender
{
   [NSApp beginSheet:sheet
      modalForWindow:mainWindow
      modalDelegate:nil
      didEndSelector:NULL
        contextInfo:nil];
}

- (IBAction)closeEditor:(id)sender
{
   [NSApp endSheet:sheet];
   [sheet orderOut:sender];
}

@end
In the -init: method, we initialize the AppDelegate by setting and retaining
a reference to a rather complex default predicate. When the XIB is loaded at
run-time, the textbox shows exactly this predicate and it can be edited by
invoking the edit sheet.
The actual implementation of the -openEditor: and -closeEditor: methods
aren’t too exciting.
Downloading the source 
You can download the source code for this tutorial as an Xcode project here.

Have a blast!